Creating an Angular Component Library - Workspace Setup
Published on
One fairly recent feature with Angular is the ability to generate libraries with the Angular CLI. A library is essentially a group of components, directives, service, pipes, interceptors, etc that allows for maximum code reuse by installing the library in multiple applications, think DRY principles.
This next post we will setup a workspace to create a reusable component library and in subsequest post we will cover creating some components for our library.
Prerequisites
Creating Our Workspace
First we will have to create a workspace. You can think of workspaces as an root directory that may contain one or more Angular projects, projects being either applications or libraries.
Now there isn’t a command to generate a workspace per se but instead use the same new command with the CLI but with one addition. We will use the createApplication switch set to false with our new command which will prevent the CLI from generating a root application in our workspace.
ng new angular-component-library-example --createApplication=false
Now with a empty workspace created we can create a demo application and our component library. When generating applications and libraries in a workspace, the CLI will create a projects directory and place all application and libraries in this directory by default.
Lets create our demo application…
ng generate application demo --routing=true --style=scss
And our library…
ng generate library foo --prefix=foo
One thing to note is that we added a prefix switch to change our component prefixes from app to foo. This can be whatever you want it to be, I just chose something generic.
One downfall of generating libraries with the CLI is that there is not a style switch like there is with applications. By default the library will use pure CSS so if you want to use a CSS preprocessor, you will have to modify the angular.json file yourself. Under the projects attribute, find our foo library and add the schematics for scss style.
{
  "$schema": "./node_modules/@angular/cli/lib/config/schema.json",
  "version": 1,
  "newProjectRoot": "projects",
  "projects": {
    ...
    "foo": {
      "projectType": "library",
      "schematics": {
        "@schematics/angular:component": {
          "style": "scss"
        }
      },
      "root": "projects/foo",
      "sourceRoot": "projects/foo/src",
      "prefix": "foo"
    }
    ...
  }
}
We’re also going to update our package.json file with a couple scripts.
{
  ...
  "scripts": {
    "ng": "ng",
    "start": "ng serve",
    "build": "ng build foo",
    "package": "npm run build && cd dist/foo && npm pack",
    "test": "ng test",
    "lint": "ng lint",
    "e2e": "ng e2e"
  }
  ...
}
So what did we change here? Since we’re building a library for use in other projects, we will only ever build the library and not the demo application so I modified our build script to build foo, our library. We also added a package script which does a few things. First it runs the build script, then changes directories into the build output directory, and finally runs npm pack.
This will generate our compressed tar file, dist/foo/foo-0.0.1.tgz, which can be used to install our library in other applications/projects. You would run a normal npm install <path-to-library-tar-file> to use it in another project.
Since our demo application is part of the same workspace, we don’t need to package and install our library for us to use it in demo application. If you look in our root tsconfig.json file, there is a path alias to our library’s build output directory. This allows us to reference our built library without having to actually pack and install it.
Creating Our Library Structure
First we are going to clean up our generated library. When generating a library with the CLI, it will auto generate a few components for us. We’re not going to need these so lets delete them.
rm projects/foo/src/lib/foo.component.*
rm projects/foo/src/lib/foo.service.*
rm projects/foo/src/lib/foo.module.*
And we will have to update our public-api.ts file by removing all the exports.
Our library is going to consist of reusable components, pipes, directives, and services. We will create dirctory for each type.
mkdir projects/foo/src/lib/components \
    projects/foo/src/lib/pipes \
    projects/foo/src/lib/directives \
    projects/foo/src/lib/services
One of roadblocks that I ran into when creating this post was figuring out how we could split our library into smaller bundles to where you wouldn’t have to pull in the entire library to use only a few components. While searching for an answer to this problem I came across a couple solutions.
One solution was to break the library up into smaller libraries so we would have to generate new libraries for each type: components, pipes, services, etc.
Another solution was to basically setup our library in a way that tells ng-packager to generate separate bundles for each of our library’s subdirectories. This will make our library tree shakable meaning that when we build an application that uses our library, the Angular compiler will shake off or exclude any bundles/modules that aren’t needed from our library. I came across this article that provides a very nice explanation and walk through of this process.
By doing this we can optimize and reduce the bundle sizes of the application using our library. While we are breaking out our library into component, service, and pipe bundles, you could go even further by breaking down each component into is own bundle. We won’t be doing that here but it is an option if you’re looking to optimize your library even further.
We will need to create a index.ts file, a package.json file, and a public_api.ts file for our components directory. The index.ts file is just a normal barrel file. The package.json file will be picked up by ng-packager to tell it to generate a new bundle for this directory. And finally, the public_api.ts will export anything we want accessible from this bundle.
touch projects/foo/src/lib/components/index.ts \
    projects/foo/src/lib/components/package.json \
    projects/foo/src/lib/components/public_api.ts
Update our index.ts file to export our public api…
export * from './public_api';
Update our package.json file to tell ng-packager our entry file…
{
  "ngPackage": {
    "lib": {
      "entryFile": "public_api.ts"
    }
  }
}
An our public_api.ts will remain empty for now but in the future it will contain exports for all the components we build.
These steps are identical for all subdirectories we want separate bundles for. For now we will just setup our components directory since we will be working mostly with creating reusable components. Later on in subsequent posts we might work with some services, directives, and possibly interceptors.
Now we can update our root library’s public_api.ts (foo/src/public_api.ts) file to export our sub directory.
export * from './lib/components';
/*
  If you setup your other directories you can export
  them here as well.
*/
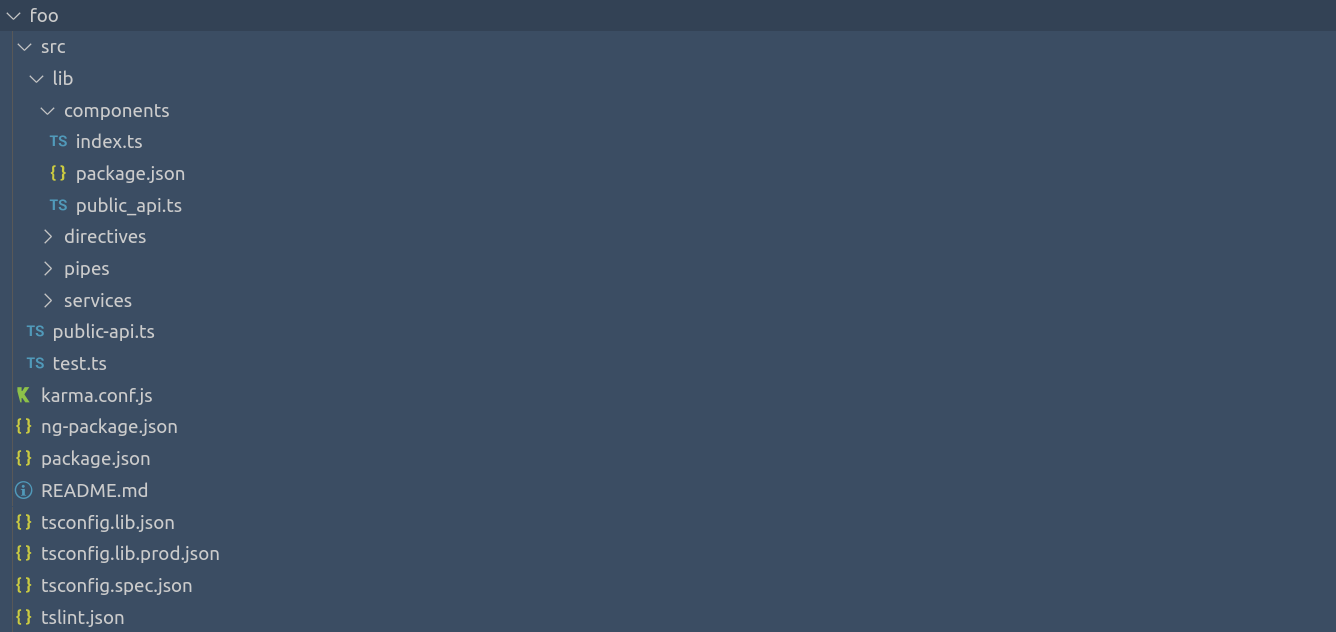
Our final file structure will look something similar to this…
Creating Shared Assets
One final step in our structure is to setup a shared assets directory for our components. We want all of our components to generally use the same color scheme, and maybe use similar animations. We will create a directory for all shared assets under our components directory of our library.
mkdir -p projects/foo/src/lib/components/_shared/scss
touch projects/foo/src/lib/components/_shared/scss/_variables.scss
Our _variables.scss file will contain all of our common shared SCSS values to keep all of our components consistently themed.
// COLORS
$default: #AAAAAC;
$primary: #DF691A;
$secondary: #3B4D63;
$success: #5cb85c;
$info: #3bb4d8;
$warning: #f0ad4e;
$danger: #d9534f;

// CONTAINERS
$border-radius: 4px;
$card-background: #FFF;
Building Our Library
Now that we have our library setup, we can easily build it with our npm script we created.
npm run build
This will build our library then output the result to our dist/ directory. A thing to remember is that every time you modify the library, you need to rebuild it in order for those changes to be available in our demo application.
If we look at the console output after our build, we will see that multiple entry points/bundles were generated.
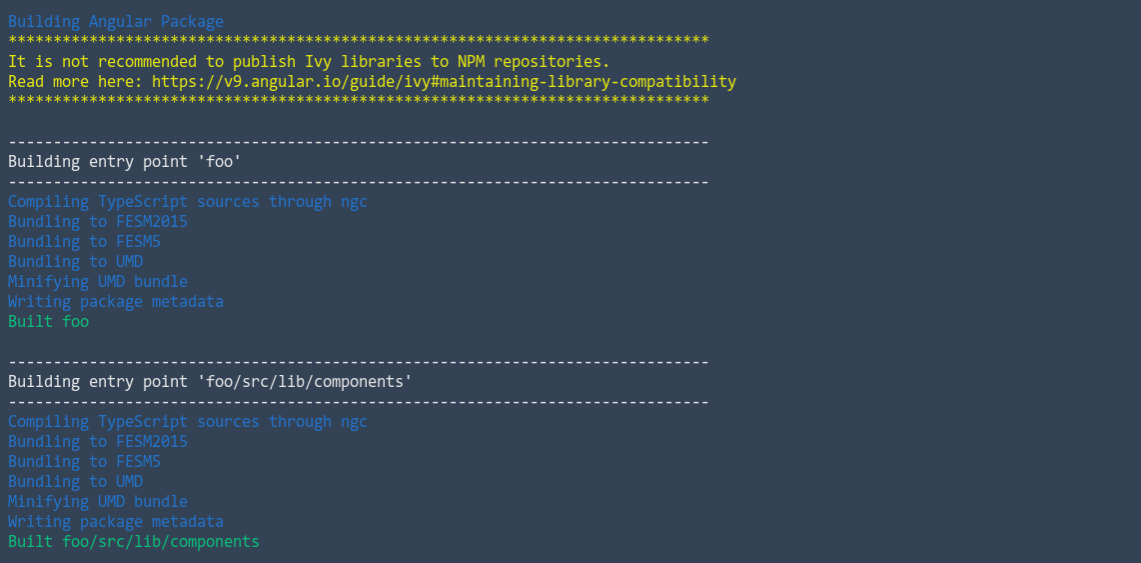
If you setup all of our subdirectories to generate separate bundles like we did for components, you will see that each subdirectory will have a separate entry point bundle in the output.
Next we will start creating some components to put in our library.
The completed github repository can be found here
More Posts
- Creating an Angular Component Library - Workspace Setup
- Creating an Angular Component Library - Alert Component
- Creating an Angular Component Library - Progress Bar Component
- Creating an Angular Component Library - Toaster Component
- Creating an Angular Component Library - Card Component
- Creating an Angular Component Library - Flip Card Component
- Creating an Angular Component Library - Overlay Loader Component
- Creating an Angular Component Library - Overlay Side Panel Component
- Creating an Angular Component Library - Button Component
- Creating an Angular Component Library - Toggle Switch Component
- Creating an Angular Component Library - Checkbox Component